How to perform a Hyper-V to VMware migration
Before you migrate from Hyper-V to VMware, you should take a comprehensive inventory, set an agreed-upon schedule and communicate the potential effects to all relevant parties.

Migrating a Hyper-V-based VM to VMware is relatively simple, but there are some strategies to make the process a little easier.
Before proceeding, ensure the VM you're migrating is in good shape. This includes making sure the trashcan is empty and the disk cleanup wizard has been run. Defragmentation is also recommended.
Ensure no virtual devices, such as serial ports or CDs, are attached to the VM. Confirm that DNS resolution is working correctly; that the vCenter, VM and virtual hosts can be pinged via their respective fully qualified domain names; and that all items can resolve all other items. This is a frequent issue and cause of migration failure.
Prior to the conversion, ensure all the nonessential services are stopped and that no work is done on the VM while it's being migrated.
We'll use the VMware converter tool to convert from Hyper-V to a VMware vCenter-based VM. There are other ways to do the migration, but VMware-based tools are the cleanest method.
Start by installing the VMware converter tool using the default options, which effectively makes the device the convertor is installed on the management station for the Hyper-V to VMware migration. Install VMware converter onto a stable jump host, just in case the computer reboots at the wrong time.
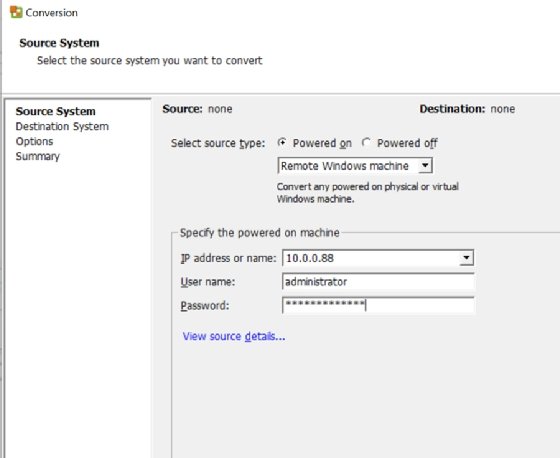
Step 1: Hyper-V source VM options
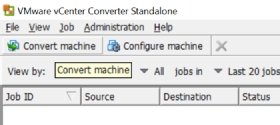
Open VMware convertor and click on the Convert Machine box as shown to the left.
This will open the VMware convertor wizard. Set source type to "Remote Windows machine".
Continue and fill in the access details for the source Hyper-V machine to be converted, as shown below. Just use the IP address and an administrative account for the VM. Click to the next window.
Step 2: VMware vCenter destination
On this screen, leave the destination type set to "VMware Infrastructure virtual machine". This screen will also require your vCenter access credentials.

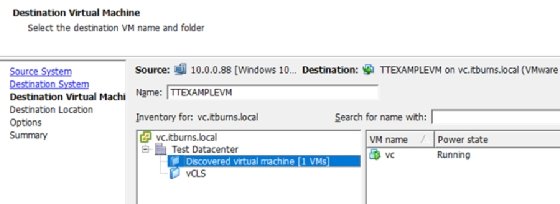
Step 3: Set location of Hyper-V converted machine
Set the location for the VMware VM using the window options to select the appropriate folder in vCenter. You can also specify a new VM name, if desired, or just leave it as is.
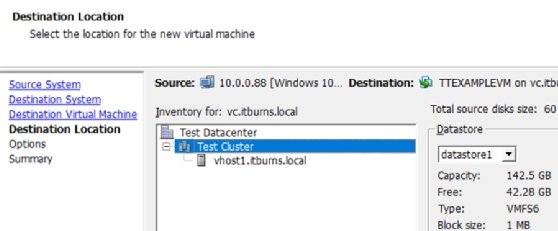
Step 4: Specifying options
On this page, unless you have a reason, just leave the host and VM hardware type as is. You might need to change the data store if there isn't enough room. You might also need to change the destination VMware host, depending on your needs.
Step 5: VM specific options
This is where you can fine-tune the options for the Hyper-V to VMware migration. Typically, the VM will be migrated and the disks will be thick provisioned. Thin provisioned is a better choice for most, but it depends what the organization is using.
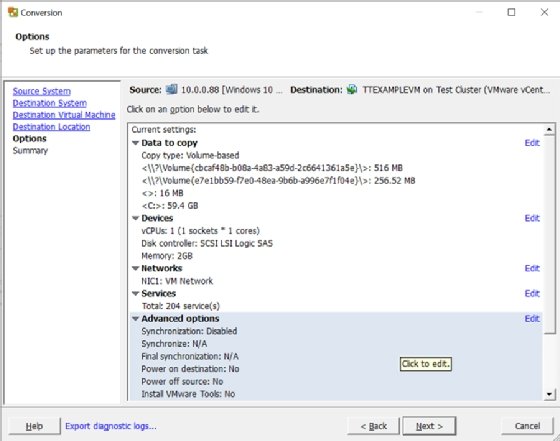
There are some options you might not be aware of under the advanced tab. The first one is "Install VMware tools on the destination VM". This automatically installs VMware tools, which is absolutely needed for good VM performance. You can install it yourself, should you wish to.
Synchronizing changes is also an important option. When enabled, it will force the convertor to do a final synchronization to ensure the two machines are identical. This functionality, when connected to power off operation, is a good way to ensure all the data expected is there and consistent.
There are also power options depending on your requirements. The administrator can specify turning off the source and turning on the destination upon successful completion.
This helps ensure all the changes from the Hyper-V source VM are fully replicated and that there is no confusion with machines being accessed post migration. An example would be if an admin were migrating from Hyper-V to VMware but keeping all the IP data and associated networks. There would be conflicting IP addresses, which, at best, would cause network issues and, at worst, create two copies of the same machine with different data on them.
Step 6: Start Hyper-V to VMware migration process
The last screen is a summary of migrations options. Assuming everything is as it should be, click the Finish button.

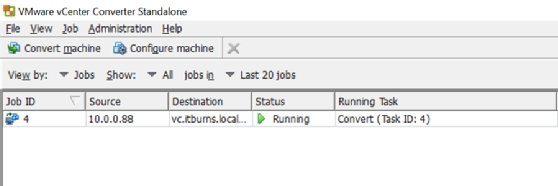
Step 7: Monitor the migration process
At this point, all the hard work of performing a Hyper-V to VMware migration should be done. The migration job will show up with a status as shown below:
The migration should complete without issue and work as expected. If something does go wrong, I suggest exporting the logs, as the detailed logs contain more information for debugging than the small window in the converter.
A final reboot after all the work is done is a good call because it shakes out all those last little bits before it comes up in production. Combined with a good validation process, this should ensure a successful Hyper-V to VMware migration.